The Terminal in OS X is often, in my opinion anyway, an overlooked
area of the operating system. Most newcomers to Macs look at it with
fear, as the sight of anything code-related or advanced is enough to put
them off for life. Fortunately, you don't have to be scared of Terminal
and think of it as a feature just for the tech-minded. Knowing some
basic Terminal commands can really enhance your experience of OS X. So,
for all the beginners out there, here is my pick of the top 10 Terminal
commands that every Mac user should know.
Before We Start...
Before we start tinkering around with it, it is probably worth taking
a couple of minutes to tell you exactly what Terminal is (all in a
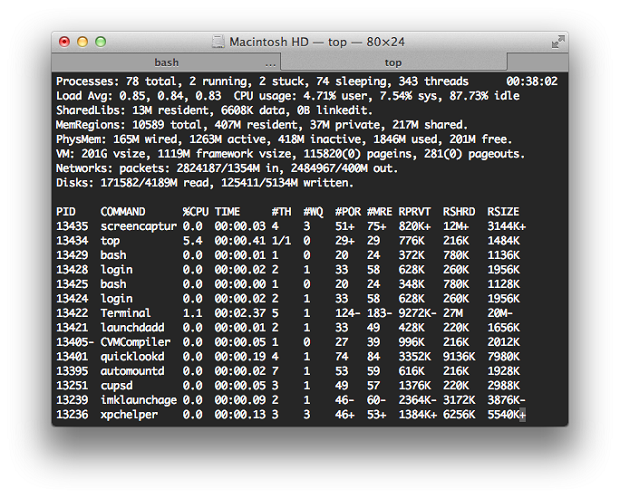
non-technical sense, of course!). Terminal.app running under OS X (Lion)
Terminal (officially called Terminal.app) is, strictly speaking, an emulator
and works off most typical UNIX commands (OS X is a UNIX-based system,
as opposed to Windows, which is NT-based). Unlike OS X, which has a
graphical user interface (shortened to GUI), Terminal works off a
text-based interface and all commands have to be typed in - this may be
the reason why some people are scared off by it!
We won't go into massive detail on how Terminal works but it's best
to learn the following three commands before we start this tutorial:
ls - list the contents of a particular directory
cd - change to another directory (as in DOS)
sudo - authenticate yourself a superuser to gain extra security privileges
Tip: Be extra careful when using the sudo
command. You will usually have to enter your OS X system password and
any mistakes can permanently mess up your system for good. When in
doubt, leave it out!
For people like me who write a lot of foreign accents then the pop-up
accent window that came up when you hold down a letter for a longer
period is extremely useful. But for those of you who want to write lots
of repeat letters, it can be quite annoying. Use this simple trick to
disable it:
Hit Return then log out then back in again to see the changes. If you want to change back to the norm, then simply substitute false for true in the above.
2. Change the Default Backup Periods in Time Machine
By default, Time Machine backs up every hour when it's connected but
this can be changed through Terminal. To do so, simply enter the
following command:
This makes Time Machine backup now every 30 minutes. To change it to what you want, simply replace the 1800 with the interval time in seconds (so 15 minutes would be 900 seconds, therefore enter 900). Also be aware that you are using a sudo command,
so make sure that you've typed the command exactly right before you hit
Enter (and you'll also be prompted to enter your system password).
3. Drag Dashboard Widgets onto the Desktop
I always forget that the Dashboard exists on my Mac. In fact, I
hardly ever see a need for it. But I think that's mostly down to the
fact that the widgets are hidden away inside the operating system. To be
able to drag your Dashboard widgets onto your desktop, then enter the
following command:
1
defaults write com.apple.dashboard devmode YES
You must log out then back in again and to drag a widget onto your
desktop click and hold down on it then press F12, which dismisses it
from the Dashboard and allows you to drop it onto the desktop. Your
widgets now float above open applications, similar to the Gadgets on
Windows 7.
To disable this feature, simply replace YES with NO in the above command. Again, you'll have to log out then back in again, unfortunately.
This really bugged me when I first upgraded to Lion - the fact that
when you open up something like Preview, all your recently accessed PDFs
coming popping up in your face, even if you closed them down properly.
Unfortunately there's no universal command to disable it across the
entire OS so you'll have to do it for each individual program. If you
want to disable it for Preview, then enter the following command:
Make sure you quit and restart the apps to see the changes and if you want to reverse anything, simply substitute false for true (I'm sure you're getting the hang of this by now!).
5. Show Hidden Files in Finder
By default, the Finder in OS X hides some files away from view
(mostly irrelevant ones) but if you want to see everything on your
computer, then enter in the following command:
Again, substitute false for true to hide them again.
6. Change the File Format for Screenshots
Screenshots using the built-in shortcut for OS X are really useful
but by default they are saved as PNG files. If you want to change this,
then type in the following command:
Replace file-extension with the three letter abbreviation of your desired file format, so for JPEG format simply enter JPG and for Acrobat PDF format, PDF. Terminal doesn't have to be difficult, does it?
7. Kill the Dashboard Altogether
Above, we went over the command to drop Dashboard widgets onto the
desktop, but if you want to get rid of the Dashboard altogether (for
example, if you're running an older Mac and have memory issues) then you
can do via this simple Terminal command:
Then, restart the Dock using the following command:
1
killall Dock
Et, voilà! No more Dashboard. If you find yourself afterwards lamenting after the good old days, replace YES with NO in the top command and repeat the process.
8. Securely Erase Free Space
When you delete files on your Mac, OS X still leaves fragments of the
file all over the free space on your hard disk drive, until these are
written over by new files. If you want to securely delete all the
remaining fragments on a hard disk drive (for example if you're going to
sell your Mac), then execute the following command:
Replace /name-of-drive with the drive you want to
erase. This command uses a special algorithm to wipe over each free area
of space 35 times, far above the US Department of Defense's standard,
which only requires 7 passes. Be aware though that this process can take
days on larger drives.
On a side note, the command diskutil is a really
useful one and allows you to manage local disks and volumes directly
from the Terminal (a list of sample commands is given). Be aware,
though, that most commands require root access.
9. Control Your Mac Remotely
Being able to control your Mac remotely via SSH, or secure shell, is
far more advantageous than screen sharing as it uses less system
resources and less bandwidth. The first thing you will have to do is
enable Remote Login on your Mac, which you can do by heading over to System Preferences then Sharing then click on Remote Login. Be sure to enable Remote Login on your Mac before you start anything
A little green light should come up, along with an IP address that
you can use to log in via Terminal. The connection between the local Mac
you're using and the remote one (i.e. your own one) is secure and
encrypted, meaning that any data being transferred between the two
cannot be intercepted.
To log into your Mac on another Mac, execute the command:
1
ssh-l username remote-address
Replace username with the username you'd use to log into OS X and remote-address with
the IP address given to you in the Sharing pane. You can now control
your Mac and execute Terminal commands remotely, a real plus.
10. Talking Mac!
And last but not least, if you want your Mac to speak to you, then simply use the say command, as in:
1
say Hello World!
The words will be spoken in your Mac's default voice but if you want to change this, then simply head over to System Preferences then either Dictation and Speech (on Mountain Lion) or simply Speech (on
Lion). Here you can select different voices and download new ones from
Apple's servers if you fancy. Another "useful" feature is the ability to
convert an entire text file into speech, if you so fancy. Simply enter:
1
say -o audio.aiff -f FILENAME.txt
Replace FILENAME.txtwith your own file. This will create a reading of your file as an AIFF file audio.aiffin Terminal's default directory. Tip: Ever wondered if the Mac operating system is
pronounced "OS ten" or "OS ex?" Your Mac knows the answer! Try typing
"say OS X" into Terminal. The result may surprise you.
Conclusion
I hope that this little tutorial has helped you demystify the
Terminal and realize that it's really not that bad to use – you can
achieve a lot more using it and if you want to customize OS X beyond
simply changing the wallpaper, then it really is your first port of
call.
I hope you have plenty of fun with the commands mentioned above,
please feel free to share your own favourites in the comments section
below for the benefit of all Mactuts+ readers!

0 comments:
Post a Comment