Can a Mac hard drive be easily removed for imaging with a forensic hardware imager?
It is really a matter of personal opinion, Mac's are an engineering marvel just ask anyone that has had to remove a hard drive from a Mac for forensic imaging and then try to put it back together properly. Depending on the model of the desktop with a set of Torx screw drivers, scissor clamp and tweezers (Figure 1) in hand, it could be as simple as removing a few screws to open the case to gain access to the hard drive. However some of the desktops require removing the glass panel with a heavy duty suction cup (Figure 2) then removing the LCD assembly before access can be had to the hard drive.

 Older Mac laptops permitted access to the hard drive by first
removing the battery and then a few screws in the battery compartment to
gain access to the hard drive. Today's Unibody laptops like the MacBook
and MacBook Pro have a removable rear panel that allows access to both
the battery and hard drive. There are several step-by-step guides
to remove the hard drive from both Mac desktops and laptops available
on the Internet. In my practice with most Mac imaging jobs it can be as
little as 15 minutes to half an hour to gain access to the hard drive
and another 15 minutes to half an hour to get it back together.
Older Mac laptops permitted access to the hard drive by first
removing the battery and then a few screws in the battery compartment to
gain access to the hard drive. Today's Unibody laptops like the MacBook
and MacBook Pro have a removable rear panel that allows access to both
the battery and hard drive. There are several step-by-step guides
to remove the hard drive from both Mac desktops and laptops available
on the Internet. In my practice with most Mac imaging jobs it can be as
little as 15 minutes to half an hour to gain access to the hard drive
and another 15 minutes to half an hour to get it back together.
So yes it can be done as long as you have the tools, are patient, careful, slow and methodical - carefully organizing each screw you remove so they go back in the right place etc. as they can be different specific lengths. However there is an easier and in my view perhaps lower risk alternative to opening the case and removing the hard drive on a Mac — use a Firewire write block in Target Mode .
Tableau T9 Firewire Write Block
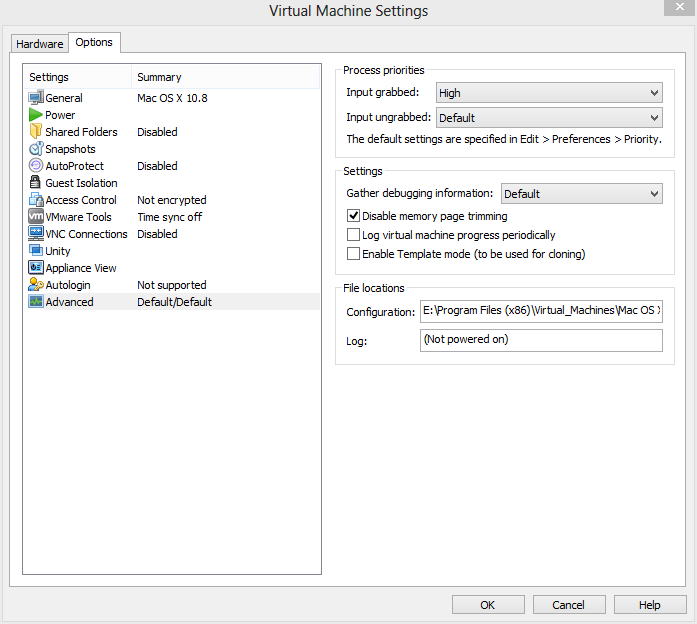
I regularly use the Tableau T9 Fire write block (Figure 3) for my Mac imaging jobs and either a Windows or Mac host with the respective forensic imaging software to then create the image. When imaging with a Windows machine as the host I use the free Tableau TIM imaging software (Figure 4) as simply put no other imaging software can match its speed as it is optimized to work with their write block product family. When using a Mac as the host for imaging I use Mac OSX Forensic Imager (Figure 5).


 What is Target Mode?
A Mac booted in Target Mode (holding down the "T" key on power on) can be attached to the Firewire port of any other host computer (Mac or PC) where it will simply appear as an external FireWire device. The hard drive within the target Mac can be imaged, formatted, partitioned, etc., exactly like any other external FireWire drive. One caveat — only the master drive (no slave drives) will be made available when operating in Target Mode.
Which Mac's support Target Mode:


 Using a Mac as the host - Mac Disk Arbitration considerations
If you plan to use a Mac to make the acquisition be sure to disable Disk Arbitration first. Mac disk arbitration will automatically mount any disk connected to it. Since there is no write protection inherent to Target Mode if you connect a Mac to a Mac using Target mode without first turning off disk arbitration your host Mac will mount the file system, which can result in the undesired alteration of data. The Mac OSX Forensic Imager has Disk Arbitration control built in - just make sure you enable it before connecting the Firewire cable to the target computer. There is also free Disk Arbitration software called Disk Arbitrator (Figure 9) that you may want to consider if you're not using Mac OSX Forensic Imager.
 If you plan to use a Mac to make the acquisition and want to be
certain that you will not make changes to the disk simply by mounting it
be sure to disable Disk Arbitration first — before you connect to the
target (this is what I use on the command line with my OSX 10.6 Mac):
If you plan to use a Mac to make the acquisition and want to be
certain that you will not make changes to the disk simply by mounting it
be sure to disable Disk Arbitration first — before you connect to the
target (this is what I use on the command line with my OSX 10.6 Mac):
To turn off Disk Arbitration:
sudo launchctl unload /System/Library/LaunchDaemons/com.apple.diskarbitrationd.plist
To verify Disk Arbitration is turned off
ps auxw | grep diskarbitrationd
To turn on Disk Arbitration
sudo launchctl load /System/Library/LaunchDaemons/com.apple.diskarbitrationd.plist
Because of the risk ofaccidentallyconnecting in Target Mode before turning off disk arbitration the author highly recommends using a firewire write blocker.
Using Windows as the host - Boot Camp considerations
If Windows was installed on the Mac in a Bootcamp partition that you will be imaging, when you connect the Windows PC to the Mac it will automatically make changes as it mounts it altering data. Unlike on a Mac there is no Disk Arbitration that can simply be turned off at the command line. A software or hardware Write Block is a necessity if using a Windows PC to image a Mac in Target mode because of the potential issue with Boot Camp Windows partitions.
Example: Imaging A 500 GB Hard Drive in a Macbook Pro using Target Mode, a T9 and a Windows host


The imaging of the 500 GB hard drive (Figure 14) over Firewire with the T9 write block took exactly 3 hours and 56 minutes. This works out to roughly 2.1 GB/min which in the author's opinion is an acceptable amount of time for the forensically sound imaging of a 500 GB HD on a Mac over Firewire 800. Had I removed the hard drive and used a hardware imager (i.e. TD1 or Voom III) I could have imaged the drive at 4 GB/min or better depending on the underlying speed of the drive itself possibly resulting in a little more then just 2 hours of acquisition time. However you still have to account for the time to remove and then replace the hard drive and the risk that you could possibly break something on the Mac in the process of removing and replacing the hard drive.

The report created imaging the Macbook Pro 500 GB Hard drive in Target Mode over Firewire 800 using the Tableau T9 write block and the Tableau TIM imaging software (Figure 15) provides the typical information you would expect from a forensic imaging solution; start and end time, case ID and notes, source hard drive data including HPA / DCO / ATA status, T9 Write Block information and completed image data including MD5 / SHA1 hashes. For the purposes of validating the integrity of the image, I ran a second acquisition using FTK Imager and validated that the image produced by FTK Imager matched the hash of the image created with TIM (Figure 16).

 In Conclusion:
In the author's opinion the trade off for the little time that could perhaps be saved by removing the hard drive and using a hardware imager vs. imaging in Target Mode over Firewire with the Tableau T9 write block is negligible at best and I typically will always go with not removing the hard drive.
It is really a matter of personal opinion, Mac's are an engineering marvel just ask anyone that has had to remove a hard drive from a Mac for forensic imaging and then try to put it back together properly. Depending on the model of the desktop with a set of Torx screw drivers, scissor clamp and tweezers (Figure 1) in hand, it could be as simple as removing a few screws to open the case to gain access to the hard drive. However some of the desktops require removing the glass panel with a heavy duty suction cup (Figure 2) then removing the LCD assembly before access can be had to the hard drive.
Figure 1
Figure 2
Older Mac laptops permitted access to the hard drive by first
removing the battery and then a few screws in the battery compartment to
gain access to the hard drive. Today's Unibody laptops like the MacBook
and MacBook Pro have a removable rear panel that allows access to both
the battery and hard drive. There are several step-by-step guides
to remove the hard drive from both Mac desktops and laptops available
on the Internet. In my practice with most Mac imaging jobs it can be as
little as 15 minutes to half an hour to gain access to the hard drive
and another 15 minutes to half an hour to get it back together.So yes it can be done as long as you have the tools, are patient, careful, slow and methodical - carefully organizing each screw you remove so they go back in the right place etc. as they can be different specific lengths. However there is an easier and in my view perhaps lower risk alternative to opening the case and removing the hard drive on a Mac — use a Firewire write block in Target Mode .
Tableau T9 Firewire Write Block
I regularly use the Tableau T9 Fire write block (Figure 3) for my Mac imaging jobs and either a Windows or Mac host with the respective forensic imaging software to then create the image. When imaging with a Windows machine as the host I use the free Tableau TIM imaging software (Figure 4) as simply put no other imaging software can match its speed as it is optimized to work with their write block product family. When using a Mac as the host for imaging I use Mac OSX Forensic Imager (Figure 5).
Figure 3
Figure 4
Figure 5
What is Target Mode?A Mac booted in Target Mode (holding down the "T" key on power on) can be attached to the Firewire port of any other host computer (Mac or PC) where it will simply appear as an external FireWire device. The hard drive within the target Mac can be imaged, formatted, partitioned, etc., exactly like any other external FireWire drive. One caveat — only the master drive (no slave drives) will be made available when operating in Target Mode.
Which Mac's support Target Mode:
- iMac (Slot Loading) with Firmware version 2.4 or later
- iMac (Summer 2000) and all models introduced after July 2000
- eMac (all models)
- Mac mini (all models)
- Power Mac G4 (AGP Graphics) with ATA drive
- Power Mac G4 Cube
- Power Mac G4 (Gigabit Ethernet) and all models introduced after July 2000
- Power Mac G5 (all models)
- Mac Pro (all models)
- iBook (FireWire) and all models introduced after September 2000
- PowerBook G3 (FireWire)
- PowerBook G4 (all models)
- MacBook Pro (all models)
- MacBook models introduced before October 2008
Figure 6
Figure 7
Figure 8
Using a Mac as the host - Mac Disk Arbitration considerationsIf you plan to use a Mac to make the acquisition be sure to disable Disk Arbitration first. Mac disk arbitration will automatically mount any disk connected to it. Since there is no write protection inherent to Target Mode if you connect a Mac to a Mac using Target mode without first turning off disk arbitration your host Mac will mount the file system, which can result in the undesired alteration of data. The Mac OSX Forensic Imager has Disk Arbitration control built in - just make sure you enable it before connecting the Firewire cable to the target computer. There is also free Disk Arbitration software called Disk Arbitrator (Figure 9) that you may want to consider if you're not using Mac OSX Forensic Imager.
Figure 9
If you plan to use a Mac to make the acquisition and want to be
certain that you will not make changes to the disk simply by mounting it
be sure to disable Disk Arbitration first — before you connect to the
target (this is what I use on the command line with my OSX 10.6 Mac):To turn off Disk Arbitration:
sudo launchctl unload /System/Library/LaunchDaemons/com.apple.diskarbitrationd.plist
To verify Disk Arbitration is turned off
ps auxw | grep diskarbitrationd
To turn on Disk Arbitration
sudo launchctl load /System/Library/LaunchDaemons/com.apple.diskarbitrationd.plist
Because of the risk ofaccidentallyconnecting in Target Mode before turning off disk arbitration the author highly recommends using a firewire write blocker.
Using Windows as the host - Boot Camp considerations
If Windows was installed on the Mac in a Bootcamp partition that you will be imaging, when you connect the Windows PC to the Mac it will automatically make changes as it mounts it altering data. Unlike on a Mac there is no Disk Arbitration that can simply be turned off at the command line. A software or hardware Write Block is a necessity if using a Windows PC to image a Mac in Target mode because of the potential issue with Boot Camp Windows partitions.
Example: Imaging A 500 GB Hard Drive in a Macbook Pro using Target Mode, a T9 and a Windows host
- Hold down the option key when powering on the laptop to see if there is a firmware password required (Figure 7). If there is a password then remove it as noted earlier, if the Start Up Manager screen (Figure 6) comes up you have no firmware password so simply power the laptop back off.
- Hold down the T Key when powering on the laptop to enter target mode (Figure 8)
- With the laptop started in Target mode you can now connect the Tableau T9 to the host computer (Figure 10) and target drive Firewire 800 port on the Mac Laptop (Figure 11) Note: Firewire 400 is also supported and the host can also connect via USB 2.
- Power on the Tableau T9 and on the T9 LCD display select the Lun to be imaged on the Mac (Lun 0)
- Start the TIM imaging software on the Windows host, right click on the Firewire connected drive (Figure 4) and then enter a destination path for the image, select file format (DD / E01), File size, any format specific options, enter your examiner details, select the required error recovery mode, select hashing (MD5 or SHA1) desired scheduling and select submit (Figure 12). You can monitor the status of imaging within the TIM GUI (Figure 13).
Figure 10
Figure 11
Figure 12
Figure 13
The imaging of the 500 GB hard drive (Figure 14) over Firewire with the T9 write block took exactly 3 hours and 56 minutes. This works out to roughly 2.1 GB/min which in the author's opinion is an acceptable amount of time for the forensically sound imaging of a 500 GB HD on a Mac over Firewire 800. Had I removed the hard drive and used a hardware imager (i.e. TD1 or Voom III) I could have imaged the drive at 4 GB/min or better depending on the underlying speed of the drive itself possibly resulting in a little more then just 2 hours of acquisition time. However you still have to account for the time to remove and then replace the hard drive and the risk that you could possibly break something on the Mac in the process of removing and replacing the hard drive.
Figure 14
The report created imaging the Macbook Pro 500 GB Hard drive in Target Mode over Firewire 800 using the Tableau T9 write block and the Tableau TIM imaging software (Figure 15) provides the typical information you would expect from a forensic imaging solution; start and end time, case ID and notes, source hard drive data including HPA / DCO / ATA status, T9 Write Block information and completed image data including MD5 / SHA1 hashes. For the purposes of validating the integrity of the image, I ran a second acquisition using FTK Imager and validated that the image produced by FTK Imager matched the hash of the image created with TIM (Figure 16).
Figure 15
Figure 16
In Conclusion:In the author's opinion the trade off for the little time that could perhaps be saved by removing the hard drive and using a hardware imager vs. imaging in Target Mode over Firewire with the Tableau T9 write block is negligible at best and I typically will always go with not removing the hard drive.
- Yes of course you can image in Target Mode over Firewire using a Linux platform and mounting the drive read only without a hardware write block. However using a hardware write block eliminates the possibility of inadvertently connecting in read / write mode and possibly altering evidence.
- Yes you can safely image in Target Mode using a Mac if you turn off Disk Arbitration and only then mount the drive read only without a hardware write block. However using a hardware write block eliminates the possibility of inadvertently not disabling Disk Arbitration and also mounting in read / write mode and possibly altering evidence
- Unfortunately if you're using Windows as the host and the Mac hard drive contains a Boot Camp partition with Windows on it, unless you have some form of write block enabled on the Windows host, you are likely to write to the Windows partition as Windows mounts it when you connect the host to the Target. Again using a hardware write block mitigates the potential for data being written to the disk when Windows tries to mount the Windows Boot Camp partition.


